Printing a linocut print with an etching press - Printing problems (And how to fix them)
- Michelle Hughes
- Feb 6, 2022
- 8 min read
Updated: Mar 31, 2022
Although this blog is about relief printing with an etching press, some of the tips may help when using other methods of printing lino prints.
Printmaking is often a problem solving exercise. I think that’s probably what I quite like about it. Past the basics of linocutting, there isn't a straightforward instruction manual. Many things have their problems and challenges.
I was in our monthly York Printmakers and it transpired that a few members in the group struggled with the problem too. I've also noticed it pop up a few times in the Facebook group Linocut Friends too.
With that in mind I thought I'd write this blog and share with you how I got around my problems, hoping that will help solve some of your printing problems and reduce waste.
At the bottom of this blog I've given an overview or explanation of the following:
Lino printing techniques: Some of the methods used for printing lino prints.
Printing terms
Inking problem terms explained
Printing problems
In the past I’ve had lots of problems with printing errors. In fact there were many times when I was in my studio in tears about it. A whole morning’s printing could be wasted, with barely any crisp sharp prints to show for it. The most frustrating part is that it was so unpredictable.
At first I thought it was down to humidity and temperature. I recorded the temperature and humidity in my studio to see if I could find any patterns. I use oil-based inks and these are more fluid on warmer days and stiffer on cooler days. I noticed how some days the print felt a little more stuck to the inked up block after it had gone through the press. These were generally rainy days and more humid. On other days it didn’t at all. These were the dryer spells.
I thought I was the only one having his problem. As I dug deeper and asked for advice, I heard the terms, slippage, drag and creeping being used.
It transpired that more people do have this problem but not many people talk about it. They simply reject a lot of prints and accept that as part of the process. Perhaps it’s something printmakers accept as part of the printmaking process.
I asked if anyone else in the Linocut Friends group on Facebook, were having similar problems. The printmaking community is always so helpful and supportive.
“Having one of those days. Just can’t get any decent prints off the press. Anyone else use an etching press?
I’m doing the same as always but I’ve a slight shadow and a fill-in of ink on the details.
Tried tapping the jig I pop my lino into onto the bed, tapping the paper as it goes through, adjusting pressure, adjusting the amount of ink, cleaning everything up and starting again. So frustrated. Any ideas would be welcome. Thank you."
Have you had these problems?
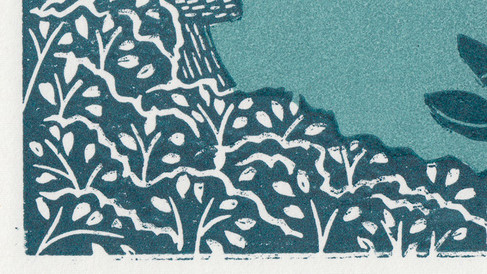
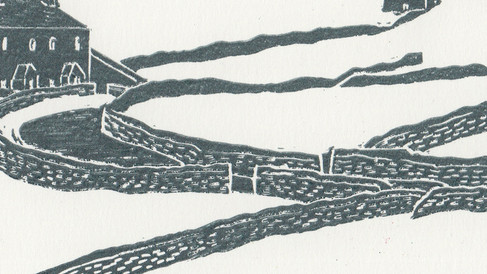
Below are examples of the printing problems I had been experiencing.


Solving the problem
Then someone, who I will be forever thankful for, explained how in the height of traditional relief printing, someone’s job was to hold the paper off the inked up blocks until it went through the printing press.
That made perfect sense. When using a roller press, the sideways movement could cause the paper to drag across the surface of the inked up block as it moves between the two rollers.
I’d nailed everything else down. The blocks were secure in a jig. The jig was secure on the bed of the etching press. I had runners on the printing bed, laid down on each side of my lino block. When I’m printing multi-block or reduction lino prints, I use Ternes Burton pins and tabs to secure the paper at one end. See notes below for more details on this.
The solution
I tried a few things out and came up with this solution.
Simply holding the paper up off the inked up surface of the block until the very last minute, prevents slippage and movement. I also lift the paper off the block as it comes out of the other side of the press. As you can imagine that requires more hands than I have! My Hawthorn’s etching press happens to have a handy hole in each side, right next to the roller. I bought a metal rod, cut it to size and threaded it through the hole. A cork on the end stops me poking myself in the eye accidentally.
Video - How to use an etching press for lino printing
In this video I’ll explain by showing you how I now print with an etching or roller press.
I've been printing this way for over 12 months and don't have any slippage or movement problems anymore. I can't begin to tell you how much I enjoy printing now!
If you're printing a one colour lino print and not using Ternes Burton pins and tabs, this method works equally well. Use a piece of masking tape to hold the top edge of the paper to your registration jig or press bed instead.
I originally used blankets on my press but have found that I can’t see any difference in the quality of printing by using my press with or without them. When I did use blankets I created a pulley system for them. Each side of my blanket was attached to a nylon thread. This thread passed through a metal pole bracket that I attached to the ceiling, thus taking the blankets up and down as I fed my print through the press. A little trickier to use but it did the job.
Printing using SoftCut or easy carve lino
Apart from when I’m teaching linocut workshops, I now use the traditional hessian backed artists lino. When I first started lino printing I used SoftCut or easy carve lino. I had so many problems with printing on an etching press that I had to swap to traditional lino. I was rejecting over half of the prints I made each time.
Plastic and synthetic lino and block printing materials are less stable. As they go through a roller press under pressure they move and squidge. The surface of the lino is smoother too and I suspect that this also makes a difference. Below are a few examples of lino prints made using SoftCut lino and printed with an etching press.
Back then I hadn’t come up with my new solution. However I have test printed a few linocut prints using this method and it seems to work. Let me know if it works for you too.


Etching press setup for lino print

Lino printing techniques
below is a brief explanation of some of the methods used for printing lino prints.
Wooden spoon
When I first started making lino prints I used my trusty wooden spoon to burnish my prints. Burnishing is rubbing the back of the paper that is laid on top of the inked up block, to transfer the ink. Imagine doing that for a whole edition of prints! A barren can also be used. See my tools and equipment blog for more info.
Etching or roller press
In July 2017 I invested in a Hawthorn Printmaker Supplies etching press. This is a roller press. A roller press exerts a horizontal pressure. By turning a handle, the press bed, inked lino block and paper slide between two metal rollers under pressure.
An etching press isn't necessarily the best type of printing press for printing relief prints. It’s used more for intaglio printmaking techniques, such as etching, drypoint and collagraph printing. Having said that, it’s a versatile type of press, as it can be used for relief and intaglio printmaking.
It’s also possible to print using some die cutting machines that are used for craft projects. They have 2 rollers with a flat bed that goes through with the turn of a handle. The Xcut Xpress die cutting machine is an example that many beginners use for lino printing. There are many tutorials on how to use one for this on YouTube.
Book press
A book printing press or screw press exerts a downward or vertical pressure, so there isn’t any movement from side to side. Cast iron lever presses, such as the Albion press, were used for commercial book printing until the middle of the nineteenth century
Printmakers such as Laura Bowell are lucky enough to use these. Apart from being hard to come by, they’re very expensive, and being made from cast iron, very heavy.
When I bought my etching press there weren’t many alternatives on the market. More recently people such as Pooki Presses have started innovating and making small table top book presses.
Printing terms
Registration device, guide or jig
Registration means correctly aligning printing blocks when printing multiple colours in one design. There are different ways of lining up your blocks and paper. In my online course, How to make a multi-block print, I explain different ways of making a registration device suitable for hand printing or printing with a press.
Runners
These are long thin strips of material used down the side of the bed of your press.. They reduce the ‘bump’ as the roller meets the lino block. They should be the same height as the block you are printing from
Printing blankets
Printing blankets even out the pressure and can give a slightly embossed look to the paper. They may also push the paper down into the carved away areas of the block.
Ternes Burton pins
Pins and tabs used to register and align layers of a print.
Mounting blocks
This isn’t essential. It’s something I started doing recently, primarily so that the lino is completely flat. This is important if using a roller press, as it can affect the quality of printing.
Inking problem terms explained
Ink shadows
Caused by movement or drag of the paper across the inked up block. More common when using roller or etching press.
Smudged or blurred prints
Can be caused by moving the paper or lino block while burnishing it.
Under inking or not enough pressure
Light prints can be caused by not enough ink being applied to the block or not enough pressure when burnishing.
Over inking
Too much ink can fill into the fine details as the cuts are shallower.
Let me know how if that helps or any other top tips in the comments below.
I'd love to hear if this has helped you. Please leave me a comment below and share with other people you think it might help.
Happy printing!
Michelle

Would you like to learn how to make a linocut print?
Online courses
Online self-paced learning. Full access for one year, so that you can study at your own pace and home. Instructional videos and step-by-step guides.
Beginners guide to linocut printing
How to make a multi-block linocut print
Linocut workshops
My linocut workshops are all held in my York print studio. I teach in small groups of no more than four people, so that everyone gets lots of one to one tuition.
Introduction to linocut printing workshop
Follow on 'jigsaw' linocut printing workshop
See my linocut workshops and online courses page for links to each of my courses and workshops.
Linocut and printmaking tools and materials
Find out more about the tools and equipment needed to create linocut prints in my 'lino cutting equipment' blog.
See step-by-step how I make my linocut prints
See examples of how I make my linocut prints in the Studio Diary section of my blog.
To be first to hear about my latest designs, online courses and workshops please join my mailing list.
My background
I’ve always loved making and fixing things. My family are very practical and I grew up surrounded by people making and repairing things. Making do and mend is in my DNA. Mainly because of necessity but also because they were very practical people. At most points in my life it’s been about saving money. More recently, it's about environmental issues, reducing waste and reusing whatever I can. I also don’t like being beaten by something and will keep on trying to find a solution to a problem.
I’ve worked as a designer since 1991. Much of my career has been working with manufacturers, craftspeople and small scale artisan producers, to translate my design sketch to a product that can be made to a certain price point and technical limitations.
Then working with them to tweak samples until they’re right. Problem solving is a skill that’s essential to that process. I’d always be the person people would come to with a problem. “Michelle will probably know or work it out.”
About the author
Michelle Hughes is a North Yorkshire landscape artist. Much of her work depicts the Yorkshire landscape and Yorkshire coast, including the Yorkshire Dales and North York Moors.
Michelle loves exploring the British countryside by bike or on foot, camera in hand, capturing ideas for her next prints. Back in her garden studio, Michelle creates simple but stylised silhouettes based on her photographs, and hand carves these shapes into lino. She hand prints with an etching press, using oil-based inks to create tonal blocks of colour. Michelle’s original linocut prints are limited editions.