
What tools and equipment do you need to make a linocut print?

Updated: Oct 28
A beginner's guide to lino cutting tools, printing inks, rollers, and materials, with recommendations for more experienced printmakers too.
If you're thinking of having a go at linocut printing, you might be wondering what tools and materials you need to get started. The good news is that you don't need lots of expensive equipment or a printing press to make your first linocut print. You can start with a few basic tools and print at home using a wooden spoon!
I'm often asked where I buy my printmaking supplies, so I've put together this guide to the materials I recommend for beginners, along with the tools and equipment I use for my professional work and linocut workshops in York.
I've been making linocut prints for over ten years, and I've tried quite a few different tools and materials along the way. I'll share what I've found works well, what I think is worth spending a little more on, and what you can manage without.
10 essential tools and materials for linocut printing for beginners
You only need a few basic supplies to start making your own hand-carved and hand-printed linocut prints.

Your beginner's linocut printing equipment checklist
Lino cutting tools: I recommend starting with an Essdee lino cutter and handle set, which includes five interchangeable cutting blades.
SoftCut lino: Essdee SoftCut lino is softer and easier to carve than traditional grey lino, making it ideal for beginners.
Glass inking slab: A smooth glass surface is ideal for rolling out ink. Glass kitchen worktop savers work well.
Ink roller or brayer: An Essdee blue handle rubber roller is a good starting point.
Printing ink: Start with a tube of water-based relief printing ink. It's easy to use and clean up at home.
Smooth cartridge paper: Choose a lightweight paper that's easier to print by hand.
Wooden spoon: For transferring the ink from your lino block onto paper. You don't need a printing press!
Tracing paper: For transferring your design onto the lino.
Pencils, pens and rubber: For drawing and developing your design.
Printer paper: Useful for drawing, practising and making test prints.
You may already have several of these things at home.
My advice is to start with a simple one-colour print. You don't need professional carving tools, expensive inks or a printing press while you're learning the basics.
Would you like to learn how to use your new linocut tools?
Buying the equipment is the easy bit! Learning how to carve your design, roll out the right amount of ink and transfer your print onto paper takes a little practice.
In my Beginner's Guide to Linocut Printing online course, I'll show you how to make your own linocut prints from start to finish, with step-by-step videos you can follow at home.
You'll learn how to transfer your design, carve your lino safely, ink your block and print by hand using a wooden spoon. You can also choose from my nature-inspired projects, including four Christmas card designs.
Which type of lino is best for linocut printing?
There are several types of lino and easy-carve printing blocks available. They feel quite different to carve, so choosing the right material can make a big difference, particularly when you're learning.

Synthetic lino: best for beginners
When I first started teaching myself linocut printing, I used Essdee SoftCut lino. SoftCut is made from a soft synthetic material, so it’s easier to carve with beginner tools.
Advantages:
Softer and easier to carve.
Easier to carve with beginner lino cutting tools.
Easy to cut into different shapes, which is useful for making cards and linocut prints using the jigsaw technique.
Disadvantages:
The material doesn't snap away at the end of a carved line like traditional lino. You need to lift the cutting tool slightly to cut away the waste material.
Lino blocks can distort under the pressure of an etching press.
Traditional grey artist's lino
I now use traditional hessian-backed grey linoleum for all my linocut prints. Sometimes it's called 'battleship' lino. Traditional lino is made from natural materials, including linseed oil, pine resin and cork dust, with a hessian backing. It’s better to use professional lino cutting tools, such as Pfeil tools with traditional grey lino, as they are sharper.
Advantages:
The end of a carved line breaks away cleanly, giving you more control over the marks you make.
Holds fine details well.
Non-printing areas are easier to clear.
Disadvantages:
Harder to carve with beginner tools.
Can become brittle as it ages, so it's best used while relatively fresh.
Harder to carve when it’s cold.
Japanese relief printmaking vinyl
Japanese vinyl is slightly firmer than SoftCut and is usually blue on one side and dark green on the other. It has a black core so that it’s easier to see where you have cut. Because it's firmer, it can work better under a printing press than softer, more flexible lino blocks. It's another material worth experimenting with as you develop your linocut skills.
For a useful comparison, read Handprinted's guide to testing different lino blocks.
What are the best linocut cutting tools?

The two main things to consider are your budget and the type of lino you're going to carve. Below is an overview of my recommendations.
Beginner lino cutting tools
Essdee lino cutting tools are a good place to start because they're inexpensive. They're especially suitable for synthetic lino like SoftCut. As they’re not as sharp, I find them harder to use on traditional grey lino.
The ABig lino cutting tools and handle set and these Japanese cutting tools for wood and lino sets are also good.
A beginner's set often includes a handle and several interchangeable blades, letting you experiment with different cutting widths and shapes. The downside is that they aren't always made to be resharpened in the same way as professional carving tools.
You don't need to invest in professional tools straight away. I'd suggest starting with an inexpensive set, learning how the different blades work and upgrading if you find you enjoy linocut printing.
Safety tip: Always carve away from your hands and fingers, keep your supporting hand behind the cutting tool and work on a stable surface.
Professional lino cutting tools: Pfeil
I use Pfeil linocut tools to carve all my linocut prints.
I bought the LSC set, which I love, and I use every tool. The best present you could ask for! They're not cheap, but they're beautifully made and, in my opinion, worth the investment.
My set includes six tools:
L 8/3: A smaller U-shaped gouge for carving lines and clearing smaller areas.
L 9/2: A small U-shaped gouge for carving lines and clearing smaller areas.
L 8/7: A wide U-shaped gouge for clearing large areas.
L 11/0.5: A very fine V-shaped gouge for tiny details.
L 15/2: A small V-shaped gouge for expressive line work.
L 12/4: A V-shaped gouge for carving broader lines.
Which Pfeil tools should you buy first?
If you want to upgrade but don't want to buy a complete set, I'd recommend starting with a small selection:
A fine V-shaped tool for details: L 11/0.5.
A small V-shaped tool for carved lines: L 15/2.
A small or medium U-shaped tool for clearing smaller areas: L 8/3 or L 9/2.
You could continue using a larger U-shaped cutter from your beginner set to clear big areas.
I've written a more detailed guide comparing three beginner linocut tool sets with a professional set.
Essdee lino cutting tools and handle set
ABig lino cutting tools and handle set
Japanese cutting tools for wood and lino sets
Pfeil professional lino cutting tools:
It includes the pros and cons of each and a video showing how the tools work on different types of lino.
Lino cutting tools for children
Essdee makes safety lino cutters with protective wings on either side of the blade, designed to reduce the risk of fingers slipping in front of the cutting edge. I haven't used these myself, so I'd recommend checking the manufacturer's age guidance and safety instructions before buying them. Children should always be supervised when using cutting tools. Find out more on the Essdee website.
How to keep your linocut tools sharp
Sharp carving tools make linocut printing much more enjoyable and safer. They cut more cleanly, require less force, and give you better control over the marks you're making. I use a Flexcut SlipStrop to maintain the cutting edges of my Pfeil tools.
What's the difference between honing, stropping and sharpening?
Honing and stropping help maintain and refine an existing cutting edge. Stropping with a suitable compound polishes the edge. Sharpening a dull or damaged tool involves removing more metal to restore the cutting edge.
How often should you strop your linocut tools?
I usually strop my Pfeil tools at least once per carving session, and more often if they start to feel like they're not cutting as cleanly. It's much easier to keep a tool sharp regularly than to wait until it's completely blunt.
How to use a Flexcut SlipStrop
I bought my Flexcut SlipStrop from Handprinted. They have helpful instructions on using it, and there's also a useful Flexcut SlipStrop demonstration on YouTube.
How to sharpen dull lino cutting tools
If stropping doesn't bring the edge back, your tools may need proper sharpening. I have my Pfeil tools professionally sharpened every year or two.
I'm quite happy doing DIY and learning how things work, but I really don't want to accidentally ruin my favourite carving tools! I previously used T.N. Lawrence in Hove, but they no longer offer that service. I'm researching other sharpening options and will update this section when I've found a suitable replacement.
If you do try to sharpen your tools yourself, follow the manufacturer's instructions and maintain the original bevel angle. Laura Boswell's YouTube channel also has useful tutorials on sharpening lino cutting tools yourself.
What are the best printing inks for linocut printing?
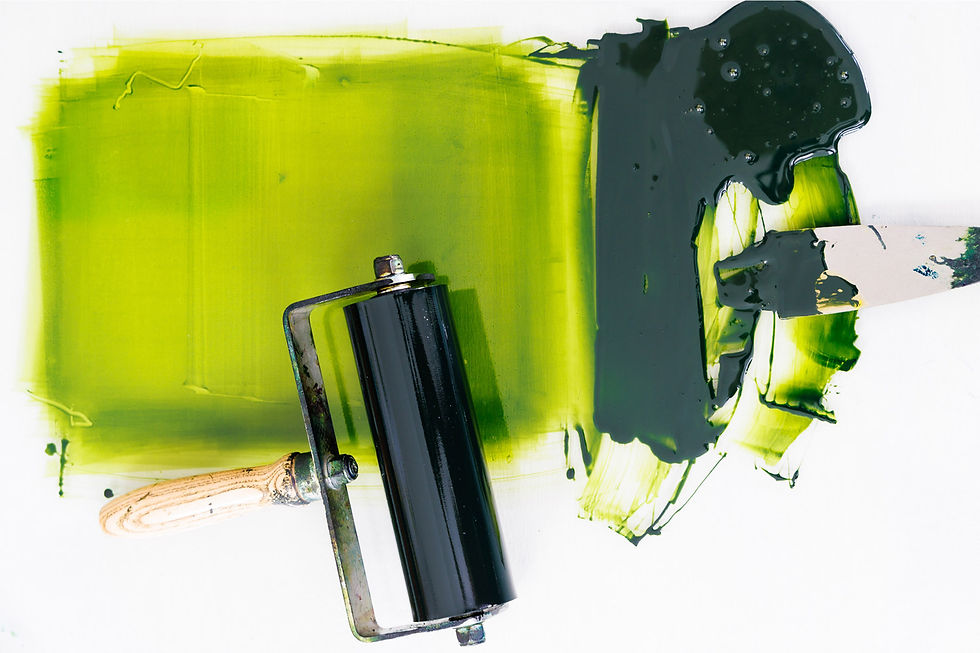
Choosing the right printing ink makes a big difference to your finished print.
There are three main types to consider: water-based inks, water-washable oil-based inks and traditional oil-based inks.
If you're making linocut prints on your kitchen table, I'd recommend starting with a good-quality water-based relief printing ink.
Water-based printing inks: best for beginners
Water-based inks are a good starting point because they dry relatively quickly and are easy to clean up with soap and water. They're ideal for making prints at home.
Very cheap inks can leave patchy coverage, so I recommend spending a little more on better quality ink if your budget allows.
Some options to consider are:
Schmincke Aqua Linoprint inks
Schmincke makes good-quality water-based relief printing inks, including small starter sets. Schmincke Aqua Linoprint inks
Adigraf water-based block printing ink
Another option for printing on paper, recommended by Handprinted. Adigraf water-based inks
Speedball water-based block printing inks
These are also suitable for beginners learning to print at home They’re made in the US, so prices have increased in the UK.
Water-washable oil-based printing inks
Water-washable oil-based inks are a good option if you want to try oil-based printing with easier clean-up. They can be cleaned using the manufacturer's recommended soap-and-water method. They stay workable on your inking slab longer than water-based inks, usually for the whole day, giving you more time to print.
Cranfield Caligo Safe Wash Relief Printing Inks
These are popular professional-quality inks made in the UK. The inks contain a small amount of driers, so you can only store leftover ink for a few days if you wrap it to keep air out.
Speedball Professional Relief Inks
Another range of water-washable oil-based relief inks. Make sure you choose the Professional Relief Ink range rather than Speedball's traditional oil-based relief ink.
Stay Open oil-based inks: what I use in my studio
For all of my linocut prints, I use Hawthorn Printmaker’s Stay Open oil-based inks. These are made locally, near York, and I love using them. The inks are semi-transparent and less flat than opaque inks. I use transparent ink instead of white to lighten them. I can also print one colour over another to create additional tones.
They're designed to stay open without forming a skin on the surface. When I mix more of a particular colour than I need, I store the leftover ink in a pot so I can reuse it when printing another batch of the same limited edition. I've kept some of my mixed colours for years. I can also work with the ink on my glass slab all day without it drying out.
For cleaning my oil-based inks, I prefer to limit my use of solvents. I mainly use a spray bottle containing Ecover washing-up liquid and water, with a little more scrubbing to clean the rollers. A little vegetable oil on the roller helps loosen the ink if needed, or for a quicker clean-up, use a citrus-based cleaner such as Citri-Wash or Zest-It.
Hawthorn also makes a range of opaque Stay Open inks.
Traditional oil-based relief printing inks
Traditional oil-based inks are another option for more experienced printmakers. They can offer rich colour and longer working times. Cleaning requirements vary between products.
Two ranges to explore are Cranfield Traditional Relief Inks and Speedball Oil-Based Relief Inks. Always follow the manufacturer's cleaning and safety guidance for the particular ink you're using.
What are the best ink rollers or brayers for linocut printing?

An ink roller, also called a brayer, is used to roll a thin, even layer of printing ink onto your carved lino block. Rollers come in different widths and degrees of hardness. The hardness of rubber rollers is measured using a Shore scale.
Best rollers for beginners
Essdee rollers are a good place to start. They're a good, affordable choice for beginners, and you don't need a professional roller to get started.
They make two commonly available types:
Red-handle roller: Firmer rubber, approximately 70 Shore.
Blue-handle roller: Softer rubber, approximately 40 Shore.
I prefer the blue-handle Essdee roller.
Professional rollers: Hawthorn Printmaking Supplies
In my studio, I use Hawthorn Printmaking Supplies' 6-inch and 3-inch student medium rubber rollers. These are approximately 38 Shore. They're more expensive than beginner rollers, but I've found them great for consistent ink coverage. They’re also easier to clean if you're using oil-based inks.
What size roller do you need?
Ideally, choose a roller that's slightly wider than your lino block. This makes it easier to apply an even layer of ink.
How do you print a linocut without a printing press?
One thing I love about linocut printing is that you don't need an expensive press to get started. Once you've carved and inked your lino block, you need to apply pressure to transfer the ink onto the paper. There are several ways of doing this.

Printing with a wooden spoon
Before I could afford my etching press, I used my trusty wooden spoon, with lots of rubbing and elbow grease!
Place your paper carefully over the inked lino block and rub the back of the paper with the smooth back of a wooden spoon, applying firm, even pressure. You'll need to work across the whole design to transfer the ink evenly. It's a simple and inexpensive way to print at home.
Printing with a baren
A baren is a disc-shaped tool, usually with a handle, used to apply pressure to the back of the printing paper. It works in a similar way to a wooden spoon but is designed specifically for hand printing.
Glass printing barens
Glass artist Thomas Petit makes beautiful handmade glass printing barens in Derbyshire. They're available in different sizes and colours. Thomas Petit Glass barens
Slama Press
The Slama Press is a hand-printing tool with rotating steel balls in its base. It’s a lot like burnishing a print with lots of mini spoons! These help transfer pressure across the paper, making hand printing quicker and less tiring, particularly for larger prints.
They're quite expensive compared with a wooden spoon or basic baren, but still less costly than many printing presses. Several York Printmakers members have recommended them.
Portable relief printing presses
Lever-style relief printing presses are another option if you're making prints regularly. They apply downward pressure to the lino block and paper. Pooki Press makes portable relief printing presses in the UK, and Woodzilla makes them in Germany.
Etching presses: what I use in my studio

I use a Hawthorn 405 etching press, which can print up to A3.
An etching press has two metal rollers. You place the inked lino block and paper on the flatbed, then turn the handle to move them between the rollers under pressure. I call it my glorified mangle. Obviously, it's a lot more refined than that!
A printing press is a significant investment, and you certainly don't need one when you're starting out. Other options include traditional Albion presses and smaller bookbinding presses. An Albion press is the dream!
Want to try printing without a press?
If you've bought some lino cutting tools but aren't quite sure how to get started, my Beginner's Guide to Linocut Printing online course will take you through the whole process.
I'll show you how to prepare your design, carve your block, roll out your ink and print by hand using simple equipment. You can work through the videos at your own pace, pausing and replaying them whenever you need to.
Do you need special equipment for multi-colour linocut printing?

I'd recommend learning to make a one-colour linocut print first. Once you're confident with carving, inking and printing, you can experiment with printing several colours.
For multi-block and reduction linocut printing, you'll need a way to line up your paper and lino blocks accurately. This is called registration.
I use a registration jig made from card, together with Ternes Burton registration pins and stripping tabs. These help me position each colour layer accurately when I'm printing my limited editions.
If you're ready to move beyond one-colour printing, I also teach these techniques in my How to Make a Multi-Block Linocut Print online course.
Where can I buy lino printing kits for beginners?

Make your own card bundle 
The linocut beginners bundle
If you'd rather buy everything together, a beginner's linocut printing kit can be a good option. Before buying, check that the kit contains suitable lino, carving tools, printing ink, a roller and paper. Some kits are designed for making cards with ink pads rather than traditional roller-applied relief printing inks, so choose one that suits the type of printing you'd like to try.
Here are some suppliers and kits worth looking at:
Buying individual tools and materials gives you more choice over the quality of the ink and lino.
Lino printing ink starter sets
If you're planning to experiment with mixing colours, you might prefer to buy a set of inks rather than individual tubes. Some options include:
Schmincke Aqua Linoprint Ink Set
A five-colour water-based relief printing ink set, suitable for beginners.
The ink includes 5 x 20ml tubes. Approx £25.50.
White
Black
Permanent yellow
Cyan
Magenta
Caligo Safe Wash Relief Printing Ink Set
A set of water-washable oil-based relief printing inks.
The ink set includes 6 x 75ml tubes. Approx £55.00.*
Extender
Opaque white
Opaque black
Transparent process yellow
Transparent process blue (cyan)
Transparent process red (magenta)
Hawthorn Stay Open Ink Set
Professional-quality oil-based inks. These are the inks I use for my own linocut prints.
The ink set contains 6 x 115gm pots of ink from Hawthorn’s transparent Stay Open range. Approx £40.14.*
Stay Open Process Cyan
Stay Open Process Magenta
Stay Open Process Yellow
Stay Open Opaque White
Stay Open Dense Black
Stay Open Transparent
Where do I buy my linocut printing supplies?
I'm lucky to have Hawthorn Printmaking Supplies nearby in Murton, just outside York.
I mainly cycle over to collect my supplies. They're a lovely family-run company and always extremely helpful with advice. They make their own printing presses, and Barry, an ex-chemist, makes their inks. I love learning about how things are made, so it's never a quick visit once we get chatting!
Here are the suppliers I use and recommend exploring.
Hawthorn Printmaking Supplies
Based near York, with an online shop.
This is where I buy most of my supplies, including traditional grey lino, SoftCut lino, Stay Open inks and rubber rollers. My Hawthorn 405 etching press also came from them.
Handprinted UK
Based in Bognor Regis, with a shop and online ordering.
A specialist printmaking supplier with a wide range of relief printing tools and materials for beginners and professionals. They also have plenty of helpful advice and demonstrations on their website.
I buy my Ternes Burton registration pins, Japanese washi paper and some water-based inks from Handprinted.
Jackson's Art Supplies
A wide range of art and printmaking supplies, including specialist relief printing. I bought my Pfeil lino cutting tools here.
Intaglio Printmaker
A specialist printmaking supplier based in London, selling tools, inks, paper and other printmaking materials.
Ironbridge Fine Arts: Based in Ironbridge with an online store.
Specialises in etching presses.
John Purcell Paper: Online only.
Specialist printmaking paper suppliers.
Lawrence Art Supplies: Hove shop with an online store.
Specialises in printmaking supplies.
Shepherds: London shop and online.
Specialist printmaking paper suppliers.
Great Art: London shop with an online store.
General art supplier and printmaking supplies.
Fred Aldos: Leeds and Manchester shops and online store.
Art and craft supplier. Some printmaking supplies
Harry F Rochat: Based in Barnet with an online store.
Specialises in new printing presses, second-hand presses and restoration.
Frequently asked questions about linocut printing equipment
Is linocut printing expensive to start?
It doesn't have to be. You can begin with an inexpensive set of lino cutting tools, SoftCut lino, a roller, a tube of ink and some paper.
You may already have a wooden spoon, pencils and tracing paper at home.
I'd recommend trying a simple one-colour print before investing in more expensive equipment.
Can you make linocut prints at home?
Yes! Linocut printing is a lovely craft to do at home, and you don't need a dedicated studio. You just need a table with enough space to carve, roll out ink, and print to get started. Protect your work surface, use carving tools safely and follow the ink manufacturer's cleaning instructions.
Do you need a printing press for linocut?
No. You can make linocut prints using a wooden spoon or baren to apply pressure to the back of your printing paper. I used a wooden spoon for my prints before I bought my etching press.
What is the best lino for beginners?
I'd recommend starting with Essdee SoftCut lino or a similar easy-carve material.
It's softer than traditional grey lino and easier to carve with inexpensive beginner tools.
What ink should beginners use for linocut printing?
A good-quality water-based relief printing ink is a sensible starting point.
It's easy to clean up and works well for learning to make one-colour prints at home.
How do I learn to make my first linocut print?
Start with a simple design and learn the basic steps: transferring your design, carving the lino, rolling out the ink and printing onto paper.
You can learn through books, workshops or step-by-step online courses.
Learn how to make your own linocut prints at home

I hope this guide has helped you decide which linocut tools and materials you need to get started. If you're looking forward to having a go but aren't sure what to do next, I'd love to help you learn.

In my Beginner's Guide to Linocut Printing online course, I'll take you through every stage of making your own prints, from your first design to your finished artwork.
You'll learn:
How to choose and transfer a design onto lino.
How to use lino cutting tools and carve different marks.
How to ink your lino block for a good, even print.
How to print by hand without an expensive printing press.
How to make your own one-colour linocut prints, including nature-inspired designs and handmade Christmas cards.
You can learn at home, at your own pace, with step-by-step video demonstrations and support if you need a helping hand.
If you'd prefer to learn in person, I also run small-group linocut workshops in my garden studio in York, with a maximum of four people.
Happy printing!
Michelle
Further reading
You might also enjoy:
Would you like to learn how to make a linocut print?
Whether you’re completely new to linocut or ready to develop your skills, I offer online linocut courses and hands-on workshops in York to help you learn at your own pace.
Linocut Online Courses
Learn from home with step-by-step video lessons, guided projects and online support.
Beginner’s Guide to Linocut Printing: Learn the basics and make your first one-colour linocut print.
How to Make a Multi-Block Linocut Print: Build your skills and learn how to create colourful multi-block prints.
Linocut Workshops in York
Join me in my York garden studio for a relaxed, hands-on linocut workshop. Classes are kept small, with a maximum of four people, so there’s plenty of individual tuition and time to ask questions.
Level 1: Introduction to Linocut Printing
Level 2: “Jigsaw” Linocut Printing
Level 3: Multi-Block Linocut Printing

My book: Printing Birds and Wildlife in Linocut
Printing Birds and Wildlife in Linocut by Michelle Hughes is a practical, step-by-step guide to creating your own linocut prints. Whether you’re a beginner or an experienced printmaker, the book covers everything from simple one-colour prints to jigsaw, reduction and multi-block techniques, with plenty of guidance to help you develop your own ideas and confidence.
Keep in touch
Sign up for my VIP list
for news on my latest releases, workshops and creative inspiration
I only send monthly (sometimes bi-monthly)
About Michelle
I’m Michelle Hughes, a North Yorkshire landscape artist and printmaker based in York. My original linocut prints are inspired by the Yorkshire Coast, Yorkshire Dales, North York Moors and the wider British countryside.
I gather ideas and take photographs while walking and cycling, then bring them back to my garden studio in York. I simplify my photographs into bold, stylised designs, carve them into lino blocks and hand-print each limited edition on my etching press using oil-based inks.


Comments